Common Thread Tension Issues
- Improper Threading of the Machine: Thread may not pass through tension disks correctly if presser foot isn’t raised, causing uneven stitches.
- Mismatched Top and Bobbin Thread: Using different weights or types of thread can lead to puckering or uneven tension.
- Incorrect Tension Settings: Too tight or loose settings cause thread bunching, skipped stitches, or fabric dragging during sewing.
Improper Threading of the Machine
One of the most common issues in sewing machines is improper threading, which can lead to uneven stitches, thread bunching, or even machine malfunction. Many users forget to raise the presser foot while threading, causing the thread to bypass the tension disks. This oversight results in loose stitches or complete thread breakage. Additionally, failure to guide the thread through all the machine’s tension discs can disrupt the balance between the top and bobbin threads; To resolve this, always ensure the presser foot is lifted before threading and carefully follow the machine’s threading path. Regularly checking for tangled or caught threads can also prevent further complications. Proper threading is essential for smooth operation and consistent stitch quality, so it’s worth taking the time to do it correctly every time.
Mismatched Top and Bobbin Thread
Mismatched top and bobbin threads are a frequent cause of sewing machine issues. Using threads of different weights or types can disrupt tension balance, leading to puckering, uneven stitches, or thread breakage. For example, pairing a heavy cotton thread on top with a lightweight polyester bobbin thread can cause the machine to struggle, resulting in poor stitch quality. Always ensure both threads are of the same type and weight for optimal performance. If thread nests form under the fabric, it often indicates a bobbin thread issue. Correcting this mismatch can resolve many common problems like skipped stitches or thread bunching, ensuring smoother sewing operations.
Incorrect Tension Settings
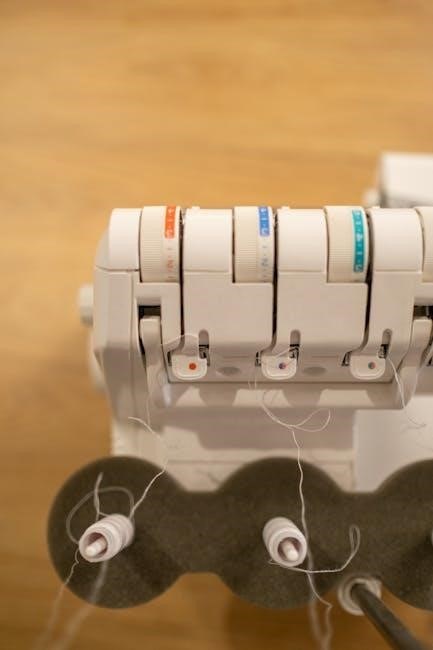
Incorrect tension settings are a common issue in sewing machines, causing problems like uneven stitches, thread bunching, or fabric dragging. If the top thread is too tight, it may lead to puckering or thread breakage. Conversely, loose tension can result in sloppy stitches or loops on the underside. Adjusting the tension disks or bobbin case is often necessary to achieve balance. Signs of incorrect tension include skipped stitches, uneven stitch length, or excessive thread noise. Properly setting the tension ensures smooth operation and consistent stitch quality. Always refer to the machine’s manual for guidance on adjusting tension settings for specific fabrics or techniques.

Threading Problems
Threading issues often arise from incorrect threading order or using poor-quality thread. Ensure the presser foot is raised and thread passes through tension disks properly for smooth operation.
Incorrect Threading Order
Incorrect threading order is a common issue that can lead to poor stitch quality or machine malfunction; Always ensure the presser foot is raised before threading to allow proper thread tension. Start by inserting the thread through the spool pin, then guide it through the tension discs, take-up lever, and finally through the needle. If the thread is not seated correctly in the tension discs or take-up lever, it can cause uneven tension, skipped stitches, or even thread breakage. Proper threading order ensures smooth operation and consistent stitch quality. Refer to your Singer sewing machine manual for specific threading guidance.
Poor Quality or Damaged Thread
Using poor-quality or damaged thread can lead to various sewing issues, such as uneven tension, thread breakage, or inconsistent stitches. Old, frayed, or low-quality thread may not run smoothly through the machine, causing loops or bunching under the fabric. Regularly inspect your thread for signs of wear or damage. Replace old thread with high-quality, compatible options suitable for your fabric type. Ensure the thread is properly wound on the spool to avoid tangles. Damaged thread can also cause unnecessary strain on the machine, leading to mechanical issues over time. Always opt for premium thread to maintain optimal sewing performance and prevent avoidable problems.
Stitch Quality Issues
- Skipped Stitches: Often caused by a dull or incorrect needle type, requiring replacement with a sharp, suitable needle.
- Thread Bunching Under the Needle: Results from incorrect threading or mismatched thread types, causing uneven tension.
- Uneven Stitch Length: Typically due to improper tension settings or fabric type, needing adjustment for consistent stitching.
Skipped Stitches
Skipped stitches are a common issue where the sewing machine fails to create a stitch at intervals, leaving gaps in the seam. This problem is often caused by a dull or inappropriate needle for the fabric type being used. Over time, needles become blunt and may bend, leading to poor stitch formation. Additionally, using the wrong needle size or type can result in skipped stitches, especially when sewing through thick or heavy-duty materials. To resolve this, it is essential to replace the needle with a sharp, appropriate one suitable for the specific fabric. Regularly changing the needle can prevent this issue and ensure smooth stitching. Proper needle maintenance is crucial for maintaining optimal stitch quality and preventing skipped stitches during sewing sessions. Always check the needle’s condition before starting a project.
Thread Bunching Under the Needle
Thread bunching under the needle occurs when the top thread does not properly connect with the bobbin thread, causing a tangled mess beneath the fabric. This issue is often due to improper threading, such as not raising the presser foot while threading or missing the tension disks. Using low-quality or damaged thread can also lead to bunching, as it may not flow smoothly through the machine. To fix this, rethread the machine with the presser foot raised, ensuring the thread passes through all tension disks correctly. Additionally, check the bobbin for proper installation and use high-quality thread suitable for your fabric type. Regularly cleaning the machine and ensuring all parts are well-lubricated can also prevent thread bunching issues. Always refer to your Singer sewing machine manual for specific threading guidelines to avoid this common problem.
Uneven Stitch Length
Uneven stitch length can occur due to incorrect settings or mechanical issues. If the stitch length is too long for the fabric, it may not hold properly. A blunt or incorrect needle size can also cause uneven stitching. Additionally, improper thread tension or misaligned feed dogs can lead to inconsistent stitch length. To fix this, adjust the stitch length setting on your Singer machine to match the fabric type. Ensure the needle is sharp and appropriate for the material. Check the thread tension and rethread if necessary. Clean and oil the feed dogs to ensure smooth fabric movement. Regular maintenance and correct settings will help achieve consistent, even stitches.
Mechanical Issues
- Needle Bending or Breaking: Often caused by using the wrong needle type or size for the fabric.
- Bobbin Thread Issues: Incorrect bobbin installation or damaged bobbin case can disrupt stitching.
- Feed Dog Problems: Dirty or misaligned feed dogs can cause uneven fabric feeding.
Needle Bending or Breaking
Needle bending or breaking is a common issue that can disrupt your sewing process. This problem often arises when using the wrong needle type or size for the specific fabric being sewn. For instance, a universal needle may not be suitable for heavy or thick materials like denim or leather, which require a heavy-duty or specialized needle. Additionally, improper threading or incorrect needle installation can cause unnecessary stress on the needle, leading to breakage. It’s essential to always use a needle that matches your fabric type and to ensure it’s correctly positioned and secured in the machine. Regularly changing the needle can also prevent such issues and maintain optimal stitching quality. If the needle frequently bends or breaks, inspecting the machine’s alignment and ensuring proper fabric handling are recommended steps to resolve the problem effectively. By addressing these factors, you can minimize needle-related issues and ensure smoother sewing experiences. Always refer to your Singer sewing machine’s user manual for specific needle recommendations tailored to your model. This will help in selecting the right needle for your projects, thereby reducing the risk of breakage and improving overall performance. Proper maintenance and adherence to guidelines can significantly extend the lifespan of your sewing machine’s components, including the needle. If the problem persists despite these measures, consulting a professional or contacting Singer’s customer support may be necessary to diagnose any underlying mechanical issues. Taking proactive steps to address needle-related problems can save time and enhance your sewing efficiency, allowing you to focus on creating high-quality projects without interruptions. Regularly checking and replacing needles as needed is a simple yet effective way to maintain your machine’s performance and prevent unexpected breakdowns during critical moments of your sewing tasks. By staying vigilant and following best practices, you can ensure your Singer sewing machine operates smoothly and consistently, delivering professional-grade results for all your sewing endeavors. This approach not only preserves the longevity of your machine but also contributes to the durability and quality of your finished projects, making every stitch count towards a flawless outcome. Over time, developing a routine for needle maintenance and selection will become second nature, allowing you to tackle a wide variety of sewing challenges with confidence and precision. Remember, a well-maintained sewing machine, coupled with the right tools like appropriate needles, is key to achieving exceptional results and avoiding common mechanical issues during your sewing journey. So, always prioritize proper needle care and selection to ensure your Singer sewing machine continues to perform at its best, providing you with years of reliable service and creative possibilities.
Bobbin Thread Issues
Bobbin thread issues are a frequent challenge in sewing. Improper installation of the bobbin, such as inserting it backward or not securing it properly, can cause thread to tangle or break. Using the wrong type of thread for the bobbin, like topstitch or metallic thread, can also lead to poor stitch formation; Additionally, overfilling the bobbin or winding it unevenly can create tension problems. To resolve these issues, ensure the bobbin is correctly seated and aligned with the machine’s guidelines. Use high-quality, medium-weight thread suitable for the bobbin and avoid overfilling. Regularly checking and replacing the bobbin thread can prevent such problems. If thread breaks frequently, inspect the bobbin case for damage or debris. Proper maintenance and adherence to Singer’s recommendations can help maintain smooth stitching and overall machine performance.
Preventative Maintenance
- Regular Cleaning of the Machine: Remove lint and debris from the bobbin area and tension discs to ensure smooth operation.
- Checking and Replacing the Needle: Change the needle frequently to prevent breakage and ensure precise stitching.
- Proper Oil Application: Lubricate moving parts as recommended to maintain optimal performance and prevent mechanical friction.
Regular Cleaning of the Machine
Regular cleaning is essential to maintain your Singer sewing machine’s performance. Turn off and unplug the machine before starting. Use a soft brush or compressed air to remove lint and debris from the bobbin area, tension discs, and feed dogs. This prevents thread from catching and ensures smooth stitching. Avoid using liquids or harsh chemicals, as they can damage internal components. Wipe down exterior surfaces with a dry cloth to remove dust and oil residue. Cleaning should be done after every major project or when you notice a buildup of lint. This simple maintenance step helps prevent mechanical issues and extends the machine’s lifespan.
Checking and Replacing the Needle
Regularly inspect the needle for signs of wear, such as bending or dullness, as these can cause skipped stitches or uneven stitching. A blunt needle may also lead to fabric puckering or tearing. To replace the needle, turn off and unplug the machine for safety. Pull the old needle downward, and insert a new one, ensuring it clicks into place securely. Always use a needle suitable for your fabric type, as incorrect needles can damage the material or the machine. Replace the needle after every major project or if you notice any performance issues. This simple maintenance step ensures smooth stitching and prevents mechanical problems.

Proper Oil Application
Regular oil application is crucial for maintaining smooth operation and preventing mechanical issues. Always use high-quality sewing machine oil, applying a few drops to moving parts like gears and bearings. Refer to your Singer machine’s manual for specific areas requiring lubrication. Turn the handwheel gently to distribute the oil evenly. Avoid over-oiling, as excess can attract dust and cause damage. Proper lubrication ensures silent running, prevents overheating, and extends the machine’s lifespan. Perform this maintenance every 1-2 months or after heavy use to keep your Singer sewing machine functioning optimally and reduce the risk of costly repairs.

Advanced Troubleshooting
Resetting the machine restores default settings, resolving hidden errors. Check the presser foot and feed dogs for proper alignment and cleanliness to ensure smooth fabric movement.
Resetting the Machine
Resetting your Singer sewing machine can resolve various software-related issues. Turn the machine off, press and hold the reset button for 5 seconds, and restart. This clears any error codes and restores factory settings. If the machine has a dedicated reset feature, use it to ensure proper operation. After resetting, re-thread the machine and test with a scrap fabric to confirm the issue is resolved. For older models, resetting might involve disconnecting the power supply briefly. Always refer to the user manual for specific instructions to avoid further complications.
Checking the Presser Foot and Feed Dogs
Ensure the presser foot is in the correct position and properly lowered before sewing. An improperly raised presser foot can cause fabric feeding issues. Clean the presser foot regularly to remove lint or debris that might interfere with its function. Check the feed dogs located under the presser foot; if they are clogged with thread or fabric fragments, use a brush to gently remove the debris. If the feed dogs are not moving, consult the user manual or contact a professional. Properly functioning feed dogs and presser foot alignment are crucial for smooth fabric movement and even stitching. Regular maintenance ensures optimal performance.

